- NB: last update for OpenViBE 0.11.0 (aug-2010). An updated version compliant to OpenViBE 2.x.x is available
Introduction
The Window Manager is a module dedicated to the handling of 2D and 3D graphical windows in an OpenViBE scenario. It provides the user with an intuitive tool to arrange windows in space in a very flexible manner. Window layouts designed with this tool are then saved to disk in scenario files along with other scenario data and settings.
Why is this tool needed?
OpenViBE scenarios are essentially made up of one or several box algorithms linked together to forward data as it is processed. Some of these box algorithms, or boxes, are meant to display information, and will therefore open one or several windows at runtime. Examples of such boxes include the Signal Display, Power Spectrum or 3D Topographic Map plugins.
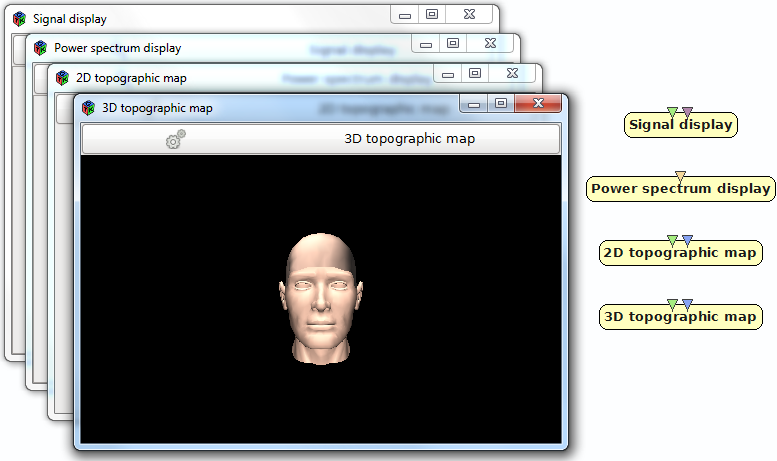
The default behaviour of the window manager as a scenario is being run is popping up as many toplevel, independent windows as required depending on the number of graphical plugins contained in the active scenario. While this may work fine for simpler cases, the screen may become cluttered with windows when more complex scenarios are being run. This is where more clever window layouts can help, by arranging graphical plugins in window hierarchies so that, e.g. all display plugins fit in one window, saving the user having to resize or place windows next to each other every time a scenario is played.
By designing a window layout offline, the user ensures graphical plugins will always appear at the same location. Also, it makes it possible to set relative sizes, so that windows requiring more screen space always do get more than their neighbours both at player launch time and when windows containing a hierarchy of windows get resized. All that is required is just a little extra time at scenario editing time.
A Practical Look at the Window Manager
The Window Manager popup
Let’s have a look at the window manager interface.
First, let’s create a new scenario. The window manager is popped up by clicking on the ‘window manager’ button in OpenViBE Designer’s top toolbar. Alternate presses on this button will show/hide the window manager.
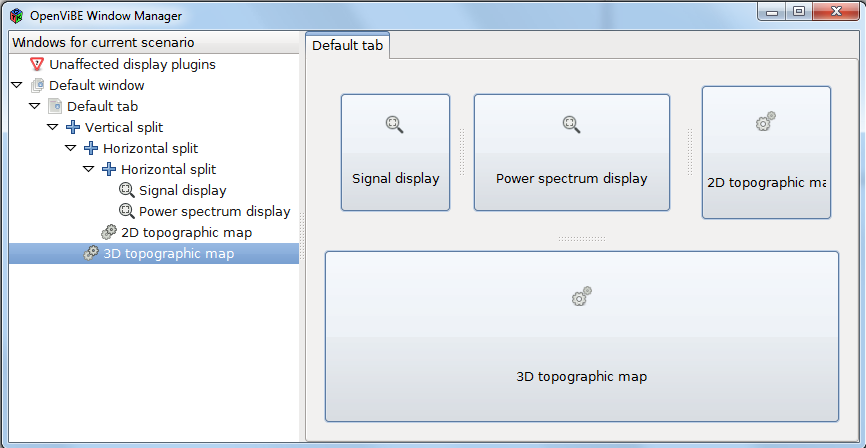
The window manager graphical interface is divided in two sections. Left is a tree view containing a list of graphical plugins used in the active scenario and the current window layout. Right is a preview of the currently selected window, if any. By default, a single window is created and selected. Its preview should appear on the right hand side, with an ‘Empty’ placeholder widget filling its single tab.
Default behaviour
Let’s add a few graphical plugins to our scenario to illustrate the default behaviour of the window manager.
Let’s drag and drop a Signal Display, a Power Spectrum, a 2D Topographic Map (which can all be found in the ‘2D Visualisation’ plugin category) and a 3D Topographic Map (found in ‘3D Visualisation’). As each box is added to the scenario, it also appears in the window manager tree view.
If we play our scenario now, we get 4 equally sized top level windows that appear at random places on the screen.
Arranging plugins in a hierarchy
Let’s make things a bit more practical by arranging plugins in a layout. One way this can be done is by drag and dropping ‘unaffected’ plugins over the window created by default on the right hand side of the window manager.
Let’s select the Signal Display plugin and drop it over the ‘Empty’ placeholder widget. This empty widget gets automatically destroyed and replaced with the Signal Display plugin. Note how the tree view structure has changed, reflecting the modified layout. The signal display plugin is now listed under the default window/default tab node.
Modifying a hierarchy
It is possible to modify the plugins arrangement at any time, even as they have been placed in windows and tabs.
The size of a plugin relative to the others lying on the same tab are modifiable by dragging the handles separating one plugin from its neighbours. Handle positions are saved along with the tree structure.
Plugins can be removed from their hierarchy and placed back under the ‘Unaffected’ node by selecting them in the tree view and clicking ‘Remove’ in the context menu that pops up on a right click. The tree structure is then automatically updated and simplified. The same mechanism is applied on the tree whenever a graphical plugin is deleted from the scenario.
Plugins may also be swapped by drag and dropping one from the tree view or window preview and dropping it over another plugin in the preview window.
Custom windows and tabs
For further flexibility, one can create custom windows and tabs.
Let’s pop up the window contextual menu by right clicking the ‘Default window’ item in the tree view. This should pop up a menu containing three options :
- ‘New tab‘ to add tabs to the selected window
- ‘Rename‘ to rename the selected window
- ‘Remove‘ to remove this window and its hierarchy from the layout (any plugin it contains would then be listed again under the ‘Unaffected’ node)
Let’s create a new tab and name it “3D Tab”. Now we want to move the 3D Topographic Map plugin to this tab, which can be done by selecting it in the tree view or the preview window, moving the cursor over the desired tab until it becomes active and dropping the plugin on this tab. Note that you cannot drag items around inside the tree view, but must drag them to a tab. And when dragging an item to a tab, you need to drag the item to the intended workplace slot inside the opened tab, not just to the tab header at the top.
We should now rename the first tab by right clicking on it in the tree view, selecting ‘Rename’ and typing in a new name such as “2D Tab”.
- Note:
- When all the windows are removed, a situation is likely to happen where the visualization widgets are listed on the left side but no window is present on the right side. In this situation, the user can be confused on where to drag and drop his widgets. The correct way to solve this problem is just to create a new empty window, right clicking the ‘Unaffected display plugins’ node in the tree view and selecting ‘New window’. Then the user is able to drag and drop his widgets in the newly created window!
Now it’s up to you to arrange your plugins to best fit your needs!


