
- NB: last update for OpenViBE 0.11.0 (aug-2010).
Overview
This tutorial details advanced box configuration settings, which require a general understanding of the Designer application. Not all settings are available for each box. This document goes through all existing ways a box may be configured, illustrating each setting with a concrete example. For more information about advanced box configuration, one should refer to the box algorithms documentation pages.
Connectors configuration
Some boxes are too generic for the box developer in that he is not able to specify how many connectors this box should own, or what type these connectors should be. Thus the design of such boxes allows the user to configure the number and/or type of connectors.
When the number of connectors a box should own is not known a priori, developers may choose to initialize the box with only one input and/or output connector, or none at all.
When the type of connector is configurable, the box developer may choose to initialize it with the ‘undefined’ type. Such connectors appear as white in the Designer, which will alert the author at scenario editing time and remind him that the connectors of the box should be configured depending on the context in which they are used.
In any case, when a box can handle a varying number of connectors, or when the type of its connectors may be changed, it displays green ‘In’ and/or ‘Out’ labels below the box name. These labels tell the author that the box has configurable input and/or output connectors.
Adding connectors
Some boxes are designed to handle a varying number of input or output connectors. For example, the Generic stream reader box (found under ‘File reading and writing/OpenViBE’) is a reader which doesn’t know in advance what kind of data it is supposed to output. It is up to the author to specify what the box should output. For example, let’s assume the input stream contains signal data as well as stimulations information. If both data types are relevant in the scenario being edited, the author can choose to add one ‘signal’ output connector and one ‘stimulations’ output connector. As the scenario is being run, the box will check what data types it should forward in the output stream and retain signal and stimulations, discarding other input data.
To add a new output connector, right-click the box and select the ‘new…‘ action. You can then specify a name and a type for the new connector.


Similarly, the generic stream writer is a generic file writer. It’s up to the author to specify what kind of data should be saved to disk by adding the appropriate output connectors to the box.
Configuring the type of a connector
To illustrate the usefulness of setting the type of a connector at scenario editing time, let’s take the example of the Epoch Average box. This box performs matrix averages, and is thus initialized with one streamed matrix input connector and one similarly typed output connector.
Since the spectrum type derives from the matrix type, a ‘spectrum’ output connector can be connected to the default ‘streamed matrix’ input connector of the epoch average box. However, doing so would result in the loss of some data specific to the spectrum type (such as the list of frequency bands min and max thresholds). To perform matrix averages while retaining type-specific information in the output flow, one can modify the type of the input and output connectors and downcast them to ‘spectrum’ type.
To do so, right-click on the box, and select the ‘configure…’ action for the first input, and then change the type to ‘Spectrum’.

Settings configuration
Some boxes allow the user to modify its settings. For example it can be useful when the box can perform an unknown number of different tasks, each one specified by a given group of settings.
Adding settings
The Run Command box (category ‘Stimulation’), which can be used to execute a system command when a given stimulation is received, can be configured with a number of various settings. Right-click the box and click New to add new settings.
When you do so, the box will have 2 more settings: one is the stimulation needed to trigger the comand, the other is the command itself.


Used on windows, this illustrative configuration will execute MS notepad when the OVTK_StimulationId_Label_01 is received, and the MS calculator when OVTK_StimulationId_Label_02 is received. Try it with a Keyboard Stimulator!
Configuring the settings
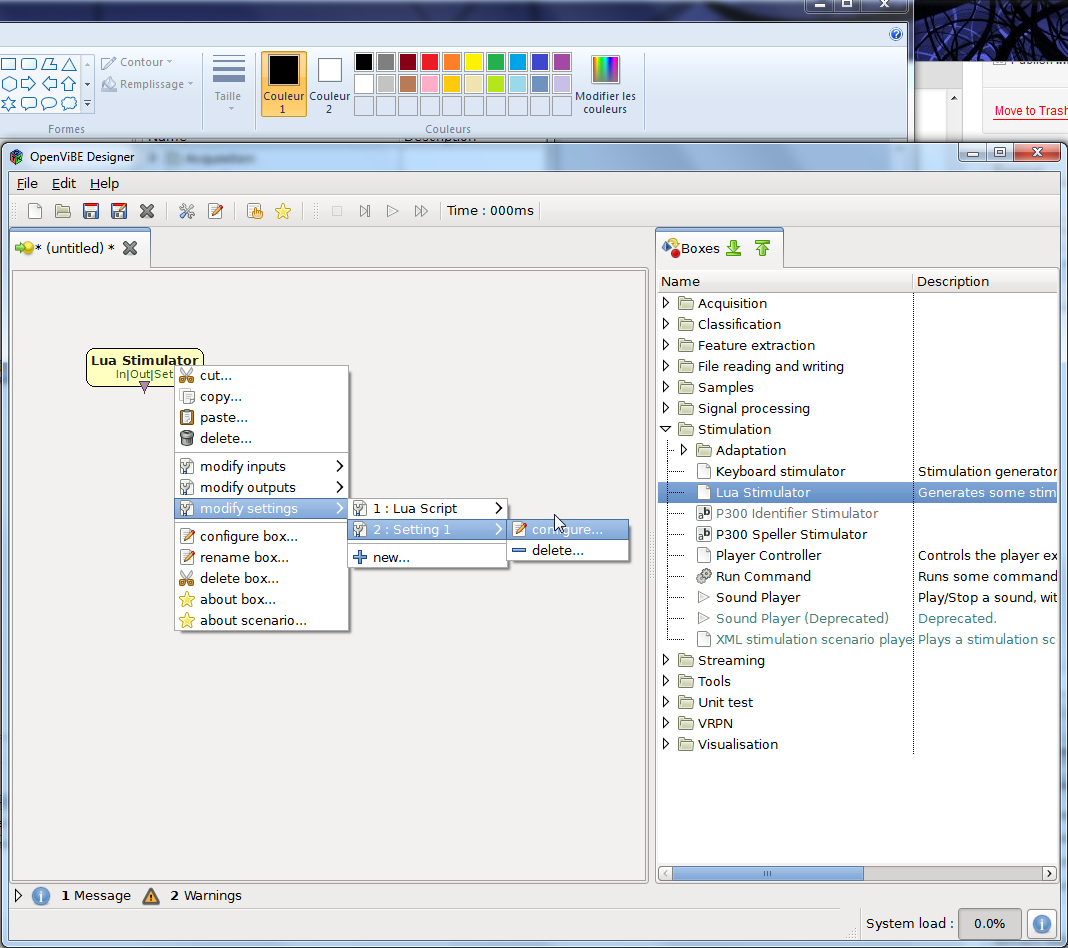
The Lua Stimulator box (category ‘Stimulation’) executes a user-defined script written in Lua that can receive and send stimulations. The box can expose settings that can then be accessed in the Lua script at runtime. In the following example, we add an Integer setting. We want to modify it with a new name and default value. Right-click the box and select the setting you want to modify. Then configure its name, type and/or default value at will.

